Tuesday, October 25, 2011

Collage Monday

Every week starts off with Collage Monday over at Donna Downey's studio. Collage is one of my favorite art forms and watching other artist's process and ideas inspires me to work in different materials and formats. Today Donna posted a collage she made from magazine photos. The colors on her page, (especially the yellow)really got me fired up today. 

While Donna's project may have inspired me to work on a new collage, my process didn't go down a road even close to Donna's. Funny how someone else's design just gets you up and gets you moving.


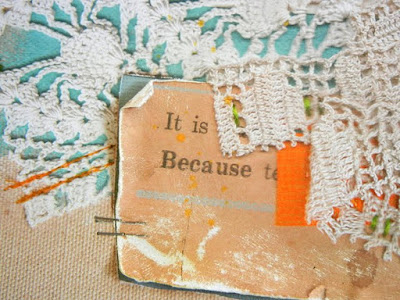
To create my Monday collage I used some leftover Graphic 45 scraps from a Tattered Angels class I took with Stayce DeWid last weekend at a Scrapbook Store and More, (my favorite LSS). Using the Graphic 45 makes my creation all the more special to me because I LOVE, LOVE, LOVE their papers. As with several of my other projects, these papers came from a 6X6 pad so the print is smaller and suits my tastes to a "t".


This was an easy and fun, (also messy), project. I'm thinking about using leftover project scraps for more of these creations in the future. My page can be cut and used for cards, tags, mini album covers, page embellishments, and probably a dozen other things. Can't wait to make new projects from it.

Thanks for stopping by.

Happy Creating.
Susan

Monday, October 24, 2011

Scrap-A-Go-Round

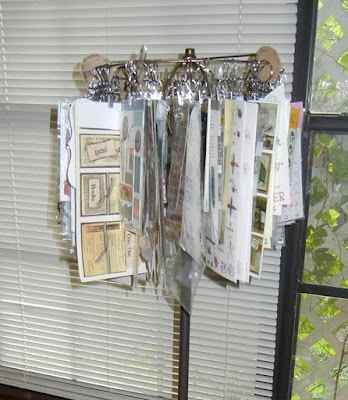
My homemade Clip It Up or as my friend Cheryl calls it, a "Scrap-A-Go-Round" has been driving me nuts. I didn't want to get rid of it since it serves a very useful purpose and it cost next to nothing to make, but something had to be done. It just wasn't working in its current location. 

A little background on this items. I used an old lamp shade, sans the shade part, to create a place to clip my stickers and various other small embellishments that come in a clear plastic sleeve. I purchased curtain clips from Ikea and did a little twisting job on them to make them suitable for hanging on my lamp shade frame. 

Purchased from Ikea in a package of about 25. The hanger part had to be twisted so that the clips hung to the inside instead of from front to back. Does that make any sense at all?

My Scrap-A-Go-Round really works great provided it has three things; location, location, location. My problems came with the location, (couldn't you have guessed that?). My crafting area is a small section of my living room that is walled off by use of bookcases. The area is very functional as long as I find creative ways to store my supplies. The Scrap-A-Go-Round hung from the underneath of a shelf that is over my craft table. Very clever place to hang it, but because I like to keep my laptop in front of it, I never could get to the contraption and I was always knocking things off. I had to move it or loose it. 

What a mess! I had to close my laptop just to take this picture.

It was my oldest daughter who actually came up with an idea on how and where to move it. K.C. my DD decided we should look for a lamp to hold the shade, (totally makes sense). She came up with the idea of a floor lamp so that it would be off my craft table all together. We searched thrift stores for the perfect shape, size, and price and hit pay dirt last Friday at the Salvation Army. This real prize of a lamp was only $8. What a deal. And it looks great, don't you think?


This floor lamp is absolutely perfect for this project. 

Can you believe those legs? The design adds stability so it won't tip over with the top heavy weight of  the shade. It's like someone custom made it for me.
Thank goodness for young minds and bright ideas.

Here's my finished creation. I LOVE IT!!! It's practical, functional, and in a much much better location.


So much neater than under the shelf.

Hope you enjoyed my little upcycling project.

Thanks for stopping by.

Happy Creating.
Susan

Thursday, October 20, 2011

Canvas Heart

My workspace is still in a state of upheaval. I feel like my brain is stuck in a planning flux and it can't escape. All kidding aside, I am making lots of progress it's just slow.

One thing I can do in my limited workspace is use my laptop. This past Monday I had some time in the evening and I tuned into Helmar's weekly upstream video with Tracy Weinzapel


I worked right along as Tracy made her own beautiful heart canvas but, as always, something DISTRACTED me; I had a really hard time with writing the quote. It took me another three days of working on the canvas to complete it but I am really pleased with the results. Best part of this project, (ok, two best parts of this project), first, I was able to watch Tracy show the correct way to use Helmar's 2 step Crackle Medium.

Don't you just love those juicy cracks?
Second, I had all the products and didn't need to scurry out to buy anything extra or substitute a major supply. (I did make my own flowers and cut some lace to make it the size I wanted and to shabby it up).


To complete one of these projects yourself you will need:

flat panel or stretched canvas,(size is up to you)
gesso
blue acrylic paint (two different shades)
red acrylic paint
charcoal pencil
lace or ribbon 
flowers
letter rubons
black and white ink,(either India ink or a permanent ink pen)
about an hour to watch the video

Should you decide to make one yourself, please share a link in the comment section below. I would love to see how your heart turns out. Also, I'm sure Tracy would love to hear from you too. There's posting info for her listed in the video.

PS If your LSS doesn't carry Helmar how about introducing them to this wonderful line of products by sharing their website  http://helmarusa.com/.

Thanks for stopping by.

Happy Creating.

Susan

Thursday, October 13, 2011

Altered Book

I'm taking a couple of classes over at My Creative Classroom and wanted to share some of my new found techniques. BTW, my craft room is in a mess. One of the classes I'm taking, The Organized Crafter, has caused me to send my messy, but always organized work space into a NIGHTMARE! I am such a disorganized reorganizer. In other words, I make a really big mess while moving and rearranging. The entire project is like a treasure hunt without a map and I'm so looking forward to using some of those forgotten treasures that I've been uncovering.

The other class I'm taking is Alter This by Shirley Pando. This is a SUPER fun class and I'm learning so much. As it turns out, I can alter a book in a very limited space. (Good thing since my work space is currently limited to the size of my self healing mat).  We are just starting our second week and up to now I've played with a few background techniques which are new to me. These include creating backgrounds with modeling paste, brown bags, waxpaper, and different types of crackle mediums, (I'm not an expert at the latter just yet. Still need lots of practice).

Here's a few photos to show off my progress so far. 

Brown paper bag. Painted, wrinkled, and glued. I used Distress Ink to highlight the raised areas.


Crackle paint. I need way more practice using this product. I also used Golden's Crackle  Paste  on another page. I'll share that at a later time.


So far this is my favorite technique - painted and wrinkled waxpaper. This picture doesn't  do it justice.


A close up of the wrinkles. Distress Ink was added to bring attention to the wrinkles.


This last one was made with lightweight spackling as an alternative to modeling paste. It worked just fine and I can use the spackling to fix a place in my ceiling that has a crack. This technique is "heavier" looking than the others and I'm not sure that I like it in my book. I plan to do another page or two using the spackling but with a much thinner coating.


A close  up of the spackling showing the lines I created using a plastic fork. The spackling can be painted before or after it is applied. I misted it with Adirondack color Wash in Sunset Orange.


Thanks for stopping by.

Happy Creating.
Susan

Sunday, October 9, 2011

Vintage Mini Envelope Book

So, is it "Vintage Mini Envelope Book", or "Vintage Envelope Mini Book"? I have no idea. Thank goodness the mini wasn't as hard to make as the title for this entry. 

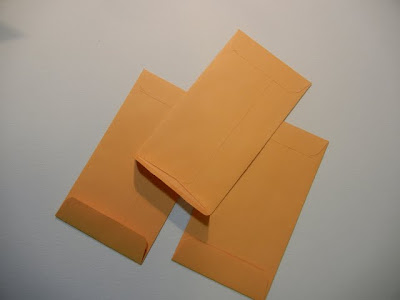
A week or so ago Julie Fei-Fan Balzer posted a mini tag book that was made from coin envelopes. I thought I would just quickly assemble one so I would burn the process into my poorly functioning brain cells, but I just couldn't stop once I started.

Here's the link for Julie's original tutorial, (I won't mess with perfection by trying to retype it here).

My mini is made from Julie's first example and I followed it pretty much to the "t" except I used a letter opener to slit open the bottom of the envie before I attached it to the other envelopes, (easier to just not include a screwed up envie than try to fix it after it's already a part of the book).


Once I attached all the envies together, I used Distress Ink in Walnut Stain and Antique Photo to age them. I love the results.


Following the same process I also made some tags for the envelope pockets.  I aged the white string the same way. Got to love Ranger products.


Here's the finished product. Wish those were real pictures, (I would love to have a collection of vintage photos), but they are cut out from a Graphic 45 On the Boardwalk 6X6 pad, (I love the smaller print on 6X6 papers). 


Front cover


Inside front cover


Back cover

Another really fun project and the beach theme coordinates perfectly with The Paper Variety's current challenge.  Their week 55 challenge is all things ocean and nautical. Deadline for entering this challenge is Tuesday at noon. Oh, and I forgot to mention the prize for the winner of this challenge is from WeScrap.  Isn't it pretty? 


Thanks for stopping by.

Happy Creating.
Susan

Saturday, October 8, 2011

A Layout at Last

Finally I scrapped a picture. I've been so immersed in mixed media that I've set aside pictures, (I could add an extra measure of art to my mixed media and get scrappy with some photos - hum - something to seriously consider). 

Last weekend while at the Celebration Crop at my favorite LSS, I pulled out a piece of sassafras that's been hanging around for months in one of my page kit bags. 


I love the layered look of the paper but it's just that, "a look". I wanted some real 3D layers. I decided to dissect the page a bit with my nifty little craft knife. Then I roughed the cut edges with something, (can't remember what it was - I forgot my distress tools), from Cheryl's bag. (got to love friends - especially those who are always there to bail you out, even if it is with just a piece of sandpaper).


After attaching a piece of cardstock to the back of the patterned paper I put down the picture, added a little trim to the pocket I created, put on some flower brads and a chipboard title and called it a day. It felt good to scrap that picture of Jackie, Cheryl, and me. It was taken over a year ago at a weekend scrap retreat.


The project really was a lot of fun. I'm finding that I like to switch up my layouts with new techniques, (maybe not new to others but new and untried by me).

Thanks for stopping by.

Happy Creating.
Susan

Tuesday, October 4, 2011

Happy Birthday to A Scrapbook Store and More

A Scrapbook Store and More celebrated their one year anniversary this past weekend and I just wanted to take a minute to say "HAPPY BIRTHDAY" to the greatest little scrapbook store in the world. 

Congratulations to Paula on her success. Also, a huge thank you for offering such a vast selection of products. I am amazed at the amount of product she has packed into her shop and the attractive displays and projects showcased. My eyes light up like a kid's at Christmas every time I visit. Also, Paula has an eye for talent, offering classes from many local designers,  (not to mention the nationally known ones too).

A Scrapbook Store and More is located in Port St Lucie and it's the only LSS in at least a three county area. In my book that makes the store a real gem. 

Happy Creating.
Susan

Sunday, October 2, 2011

My New Romance

I have a new love. Well, actually two new loves. The first is for black gesso. I used some a couple of weeks ago at my friend Cheryl's house and just had to have some of my own. I can't tell you how it transforms a basic substrate, (makes an instant background, covering up a white journal page or canvas in nothing flat), and colors just pop off the page, (not all colors and not all mediums - I'm still playing with both and feeling out what I like best).

My second new romance is for my black PITT artist brush. That thing has been untouched for months. (Actually, I never would have bought it except for the incredible clearance deal I got). Never thought I had a need to create fat black lines. Was I ever wrong. The brush is also great for touching up little mistakes on my pages and panels that have been covered in black gesso, (think of it like a black eraser that covers instead of removing the mistake).


This example is from my art journal. I was experimenting with a technique called "Black Magic",  that I picked up from Roni at Ink Stinks. I used a variety of mediums including watercolor paint, (wasn't pleased with that result and probably won't use it again - too transparent), water soluble crayons and my PITT brush for outlining. I made small dots in the center with my Terra Cotta Adirondack marker.  The image was stamped using white acrylic paint on a thick foam flower stamp, (I can't remember the manufacturer). It was a super fun project and I definitely will use this technique again.


Thanks of stopping by.

Happy Creating.
Susan